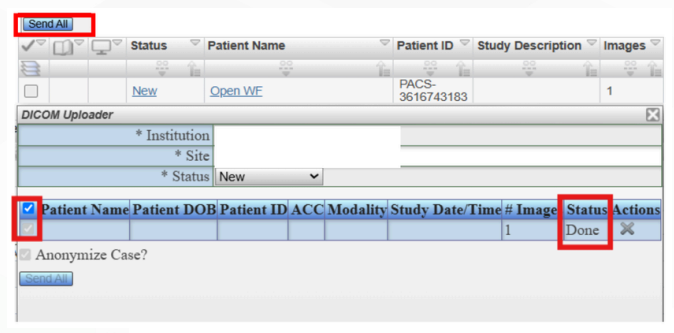
The DICOM Uploader allows bulk DICOM studies to be imported from a local device directly into Lifetrack PACS. It is particularly useful for importing historical studies from external media or devices that cannot push via network DICOM.
Instructions to use article templates
Create a step-by-step guide
Step 1: Open the DICOM Uploader
- Click the DICOM Uploader button in the Worklist header to open the upload panel. If the button is not available, please contact your PACS Administrator to have it enabled for your user account.

Step 2: Configure upload settings
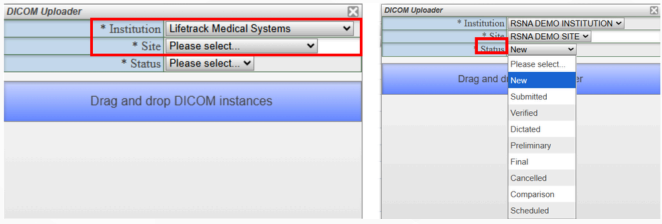
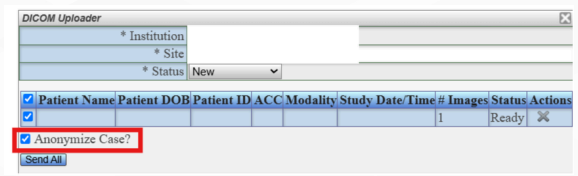
- Select the Institution, select the Site, and choose the Status that the imported studies will carry in the Worklist once uploaded.
Step 3: Add DICOM files
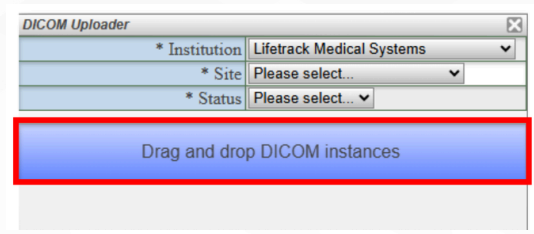
- Drag and drop a DICOM folder into the Dropbox area, or click the Dropbox to open a file browser and select files or a directory manually
Step 4: Select studies to import
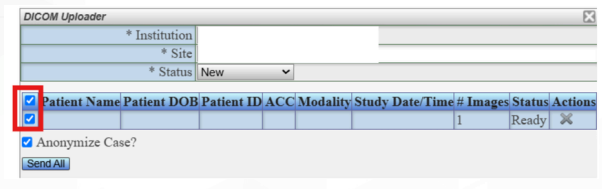
- Tick the checkbox next to each study you want to import.
Step 5: Anonymize (optional)
- Tick the Anonymize checkbox to strip identifiable patient data from the selected studies before import.
Step 6: Import
- Click Send All. Once the study has been successfully sent, its status will change to Done and become greyed out. The selected studies can then be found in the Worklist under the configured Institution and Site.